One day i was tired of buying fresh herbs, but unluckily i live in a apartment, where there is not direct sunlight most of the year. Also i am a lazy guy and i wanted some kind of supervisor of the plant health and status, to track the plants, and automatize as much as possible, while its easy to setup So i decided to create a tabletop planter which could give enough light to my plants, and also upload some stats and and images to a homeassistant server.
Main features of first version:
-
Smart home integrated (Homeassistant), easy OTA config with ESPHome, Automation throught nodeRED.
-
Custom PCB with only thru hole components (easy solder).
-
Based on ESP32cam so plenty of projects documentation available.
-
Fully 3d printed frame.
-
High efficiency and dimmable LED Driver and strips.
-
Different light spectrum available.
-
Adjustable Height.
-
OLED realtime status show.
-
Easily hackable (I2C Pins exposed).
Components
| number | Component |
|---|---|
| 2 | BXEB L0280 |
| 30 | M3 25mm aprox screws and nuts |
| 2 | M2 / M2.5 25mm screws ands nuts |
| 1 | Meanwell LDD-700L |
| 1 | 24V - 2A Constant voltage driver |
| 1 | ESP32cam with 140º camera |
| 1 | Wifi antenna |
| 1 | OLED screen |
| 1 | DHT22 |
| 1 | MP1584 |
| 2 | 18-24 AWG cable (RED/BLACK) |
| 1 | IKEA TILLGANG |
| 6 | 11x11x11 1L plastic pots |
BOM
| Part | Device | Package | Description |
|---|---|---|---|
| BOOT | PINHD-1X2 | 1X02 | PIN HEADER |
| DHT22 | PINHD-1X3 | 1X03 | PIN HEADER |
| ESP32-CAM | ESP32-CAM | ESP32CAM | Modules PCBA Module RoHS |
| FTDI | PINHD-1X4 | 1X04 | PIN HEADER |
| I2C_1 | PINHD-1X4 | 1X04 | PIN HEADER |
| I2C_2 | PINHD-1X4 | 1X04 | PIN HEADER |
| J1 | DCJ0303 | DCJ0303 | DC POWER JACK |
| J2 | CONN_022.54MM_SCREWTERM | 1X02_2.54_SCREWTERM | Multi connection point. Often used as Generic Header-pin footprint for 0.1 inch spaced/style header connections |
| J3 | CONN_022.54MM_SCREWTERM | 1X02_2.54_SCREWTERM | Multi connection point. Often used as Generic Header-pin footprint for 0.1 inch spaced/style header connections |
| LDD-700L | LDD-700L | LDD-XXXL | LED Power Supplies 9-36Vin 2-32Vout 300mA LED Driver |
| MP1584-24VTO5V | DC-DC-STEP-DOWN-MP1584 | DC-DC-STEP-DOWN-MP1584 | DC/DC Step-Down Regulator based on MP1584 chip |
3D Design and printed parts
3D design animation overview
3d printed components
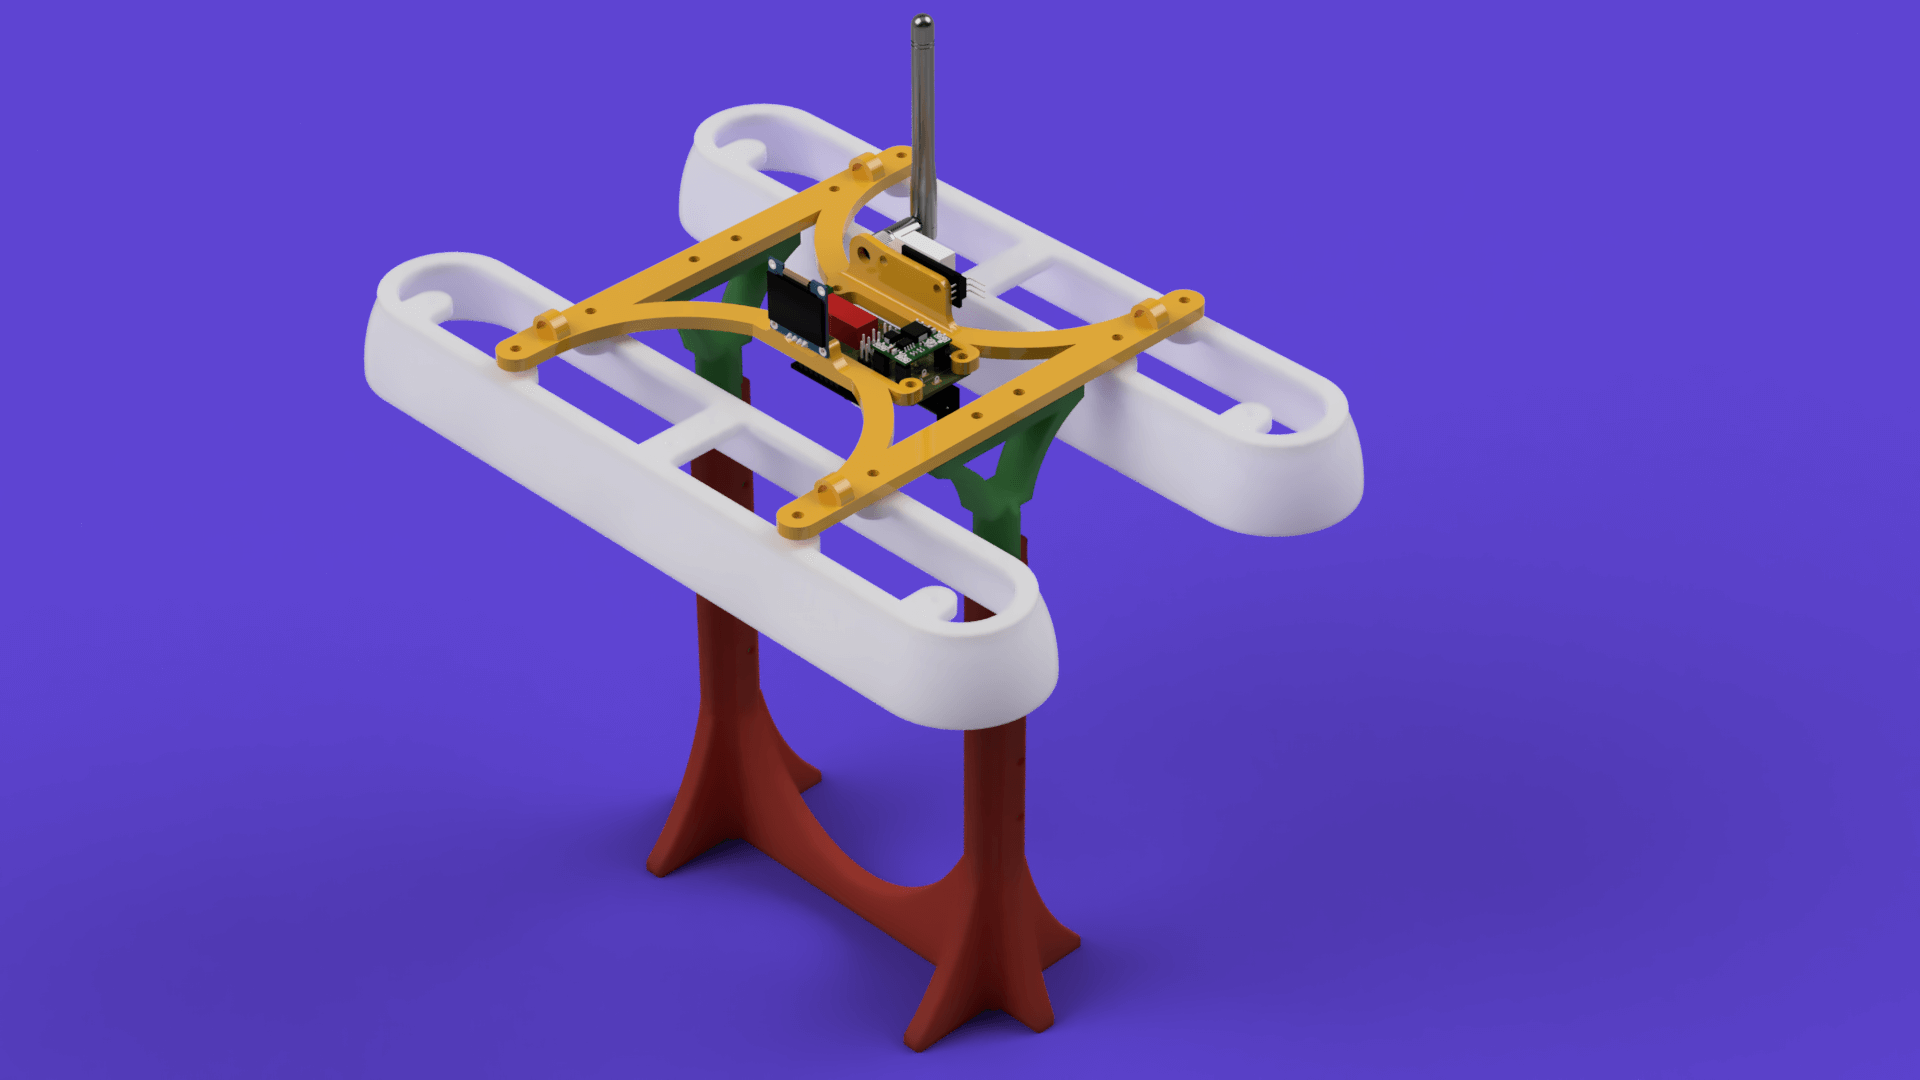
| number | Component |
|---|---|
| 1 | grass_top_lamp_part.stl (Yellow) |
| 2 | grass_reflector_body.stl (White) |
| 1 | grass_bottom_base.stl (Red) |
| 2 | grass_bottom_stick.stl (Green) |
3d print and Assembly guide
- You need a pretty precise and big printer to make the design, reflector body is nearly 30cm long, and to make it work properly, the bottom base and the stick need to be a clean juntion to be able to move.
- You need to place brass inserts in all holes of reflector and sticks parts, and in the top lamp part where the pcb is going to be mounted.
- Glue the bottom base part to the IKEA TILLGANG part, center it properly using the plastic pots.
- Place the bxeb-l0280 led bars inside of the reflector bodies.
- Place the pcb in its place with all pieces allready mounted, and screw it.
- Screw reflector bodies to main top lamp part
- Screw the sticks to the top part, place it in place over the bottom base, tighten it.
- Place outside board components in place and make electrical connections.
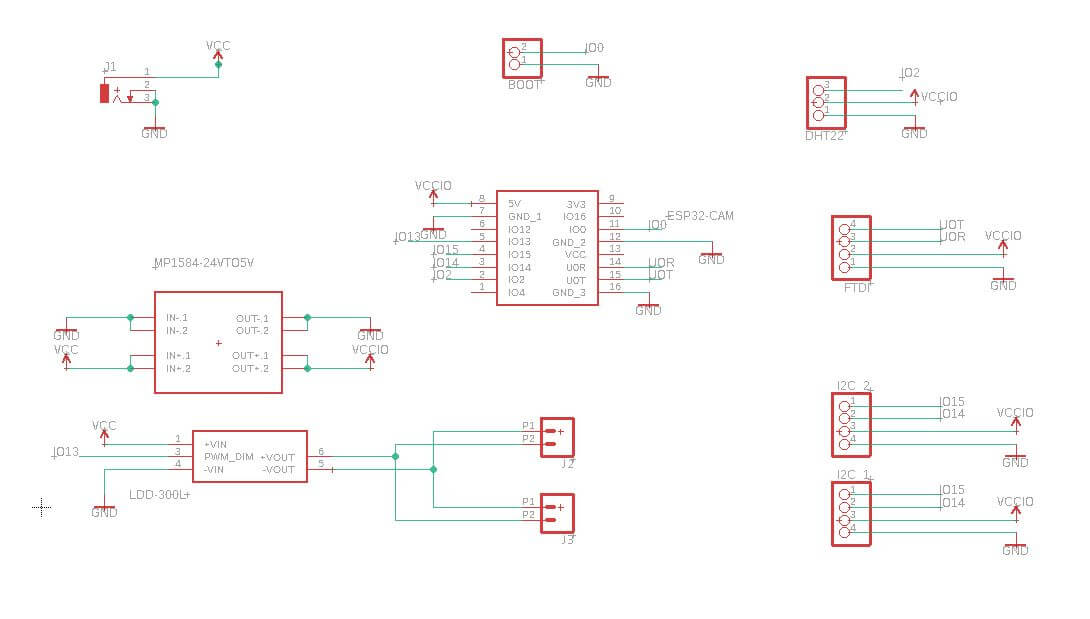
Electrical connections and PCB solder
Grass has its own small PCB board that puts together all the electronic components. Here you can check out the schematics and layout.
There are complete gerber files available on github and eagle source files can be shared.
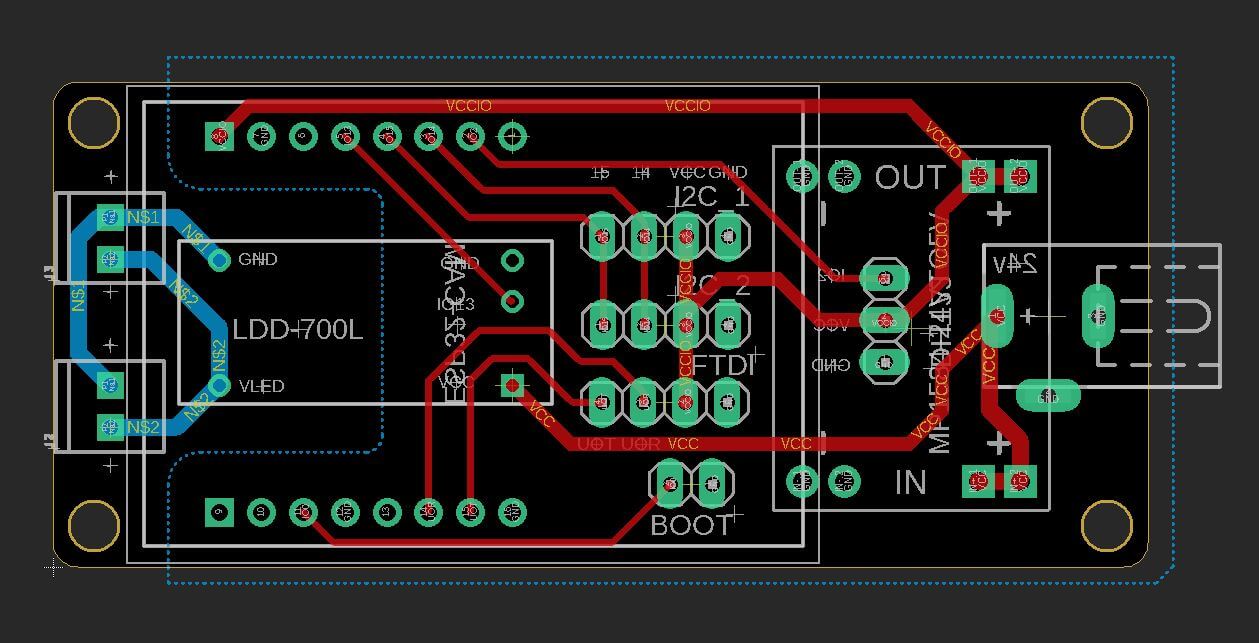
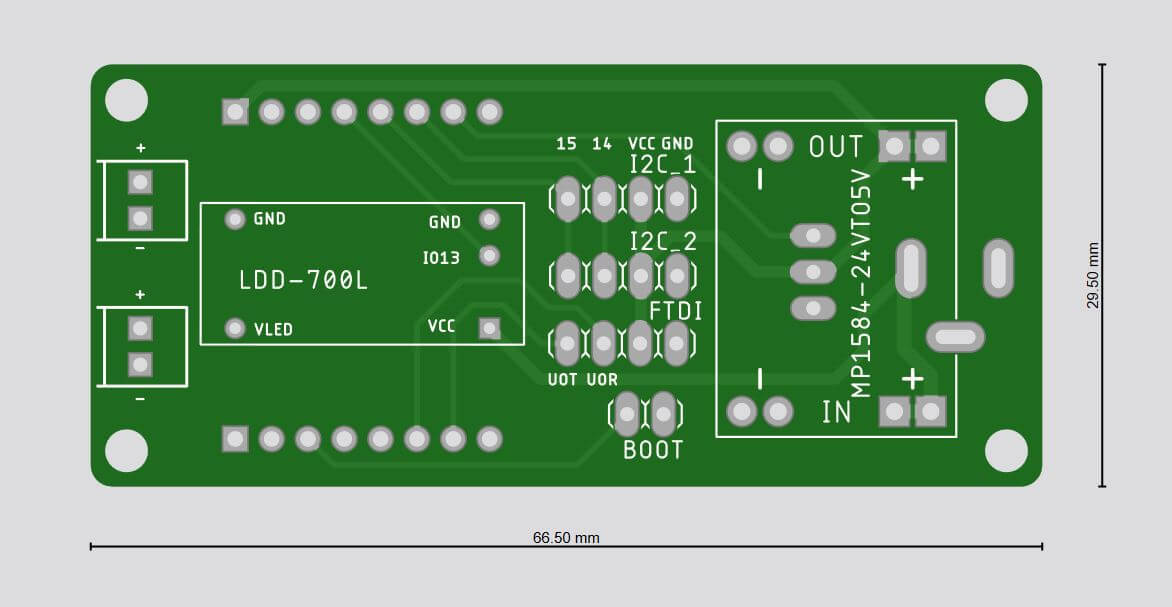
Some board render images:
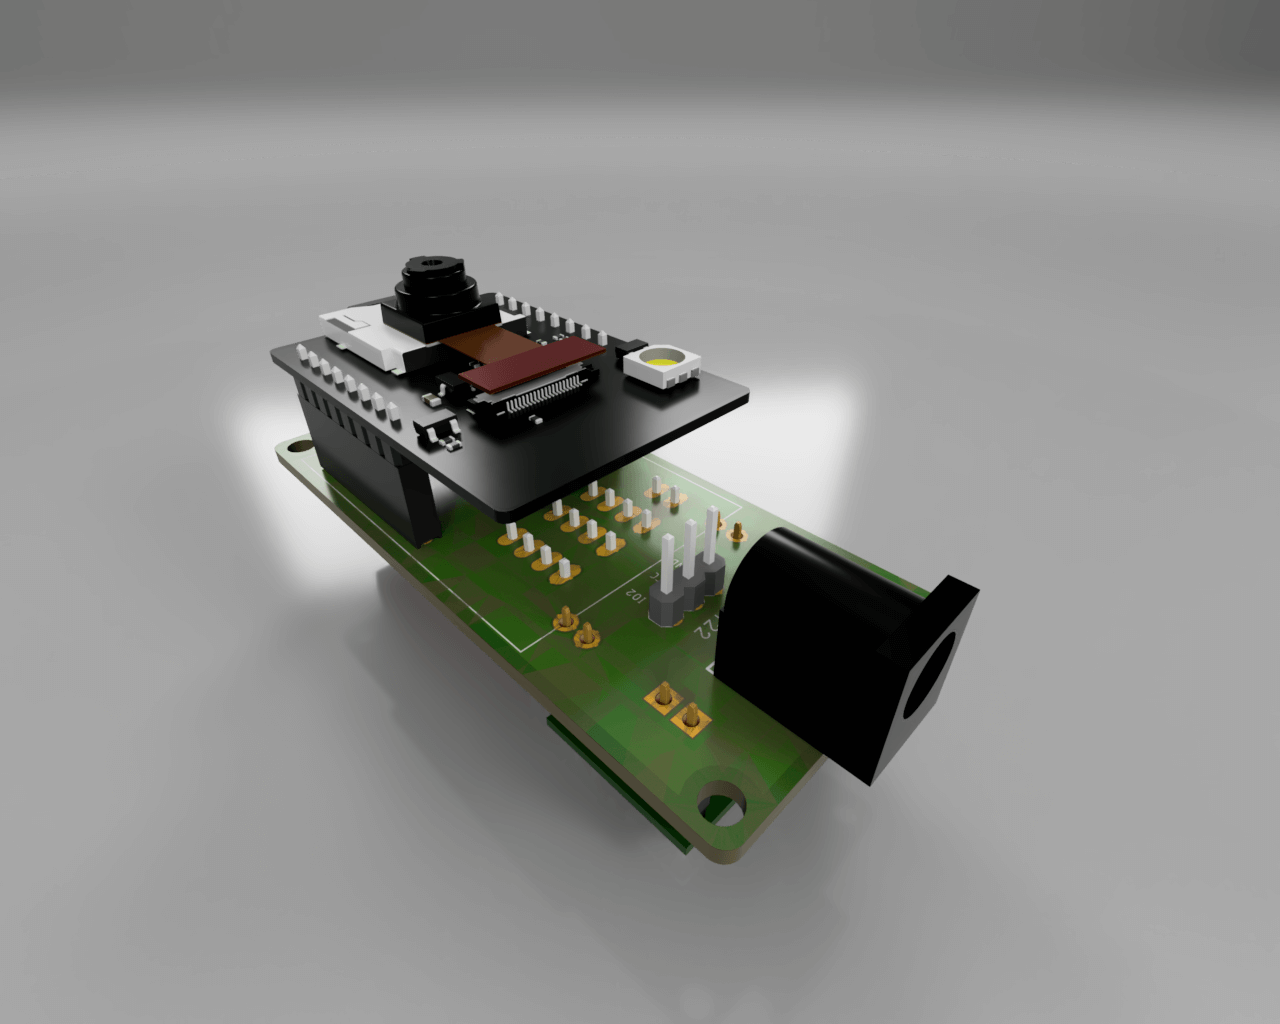
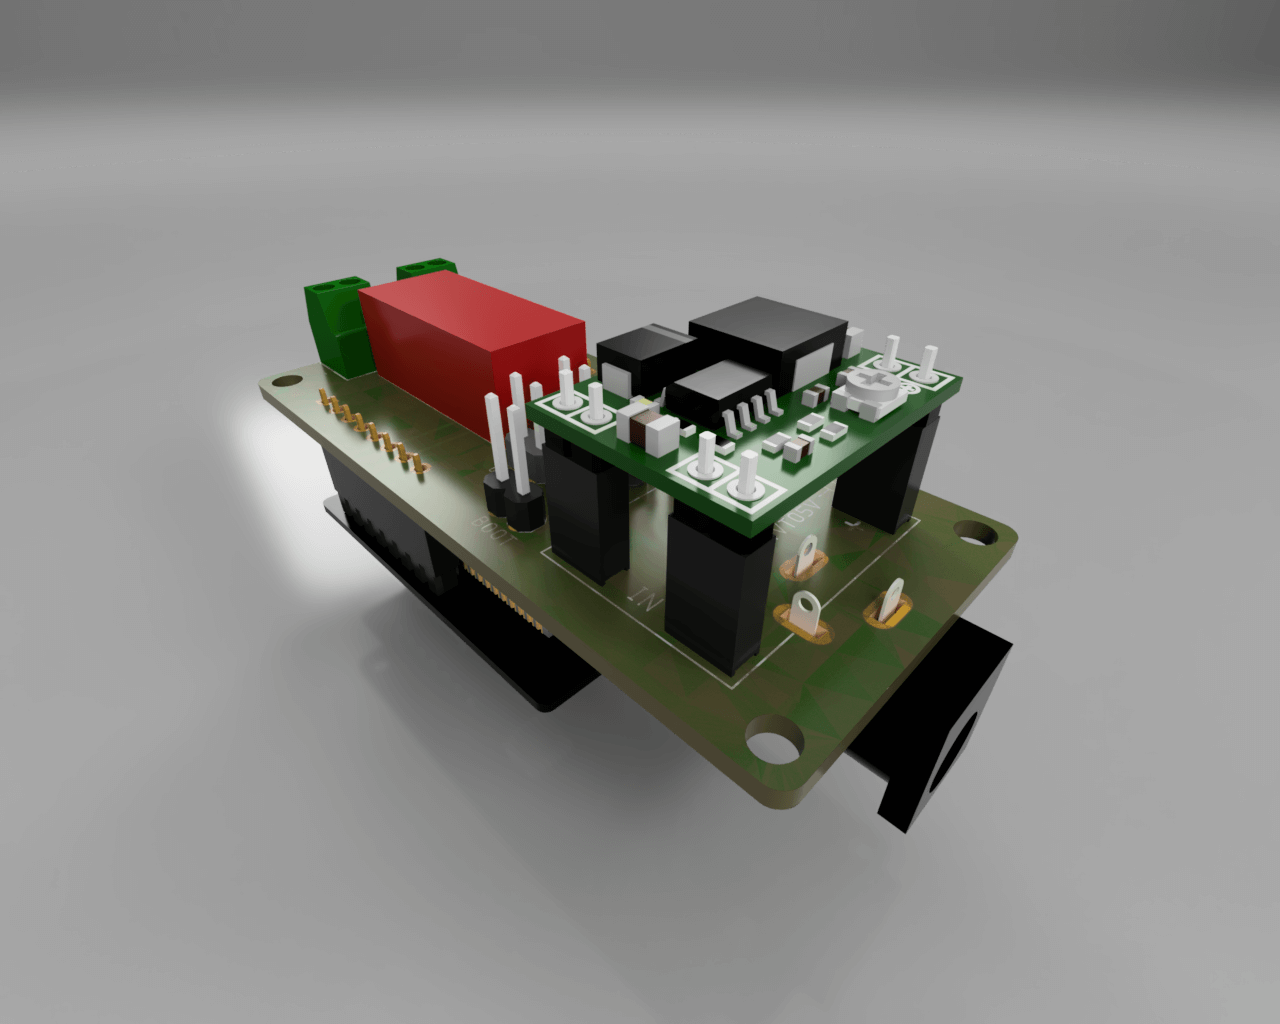
To solder the PCB can be a little bit tricky, so i made the following video as a guide:
Homeassistant ESPHome configuration
To control the light you need to add the ESPHome extension on the RPi and install a firmware on the esp32.
The following sketch contains the directives for ESPHome:
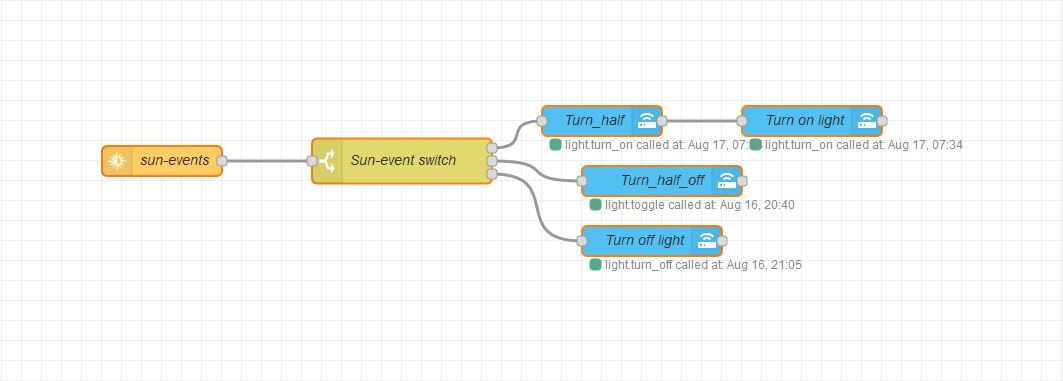
NodeRed Automation
I used a nodered core server on the raspberry pi to control the the esp32cam, with esphome is pretty forward, in my case i am using the Sun component to turn on lights at sunrise and turn them down at dawn, but any time of automation is posssible.
Timelapse Recording and conclusion
I’ve covered How to create an timelapse from the esp32 cam directly from homeassistant in the following article: Homeassistant esp32cam timelapse easy guide