After some time searching, i didn´t find a easy guide to make something as easy as getting a timelapse from a esp32cam on homeassistant, you can also can with the following guide.
Setting up Homeassistant
Initial requeriments
- Homeassistant
- Working camera entity
- Node-Red configured on hass.io server
Setup folder permissions and installing needed modules
- You need to create a folder named timelapses inside of your config folder. I use file editor for this. You also need to add following line to your configuration.yaml file, under homeassistant: to grant permissions over the folder.
homeassistant:
  #other config lines
  #...
  #...
  #end of other config lines
  whitelist_external_dirs:
  - /config/timelapses
Reload core config after this
- Now you should check if homeassistant is able to take a photo. For this go to your “Services” tab under “Supervisor” and try to run a camera.snapshot service over your camera, in my case camera.esp32_cam. Copy the following YAML entry acording to your entity name as shown in the photo. Call the service with big blue button.
entity_id: camera.esp32_cam
filename: '/config/timelapses/test_photo.jpg'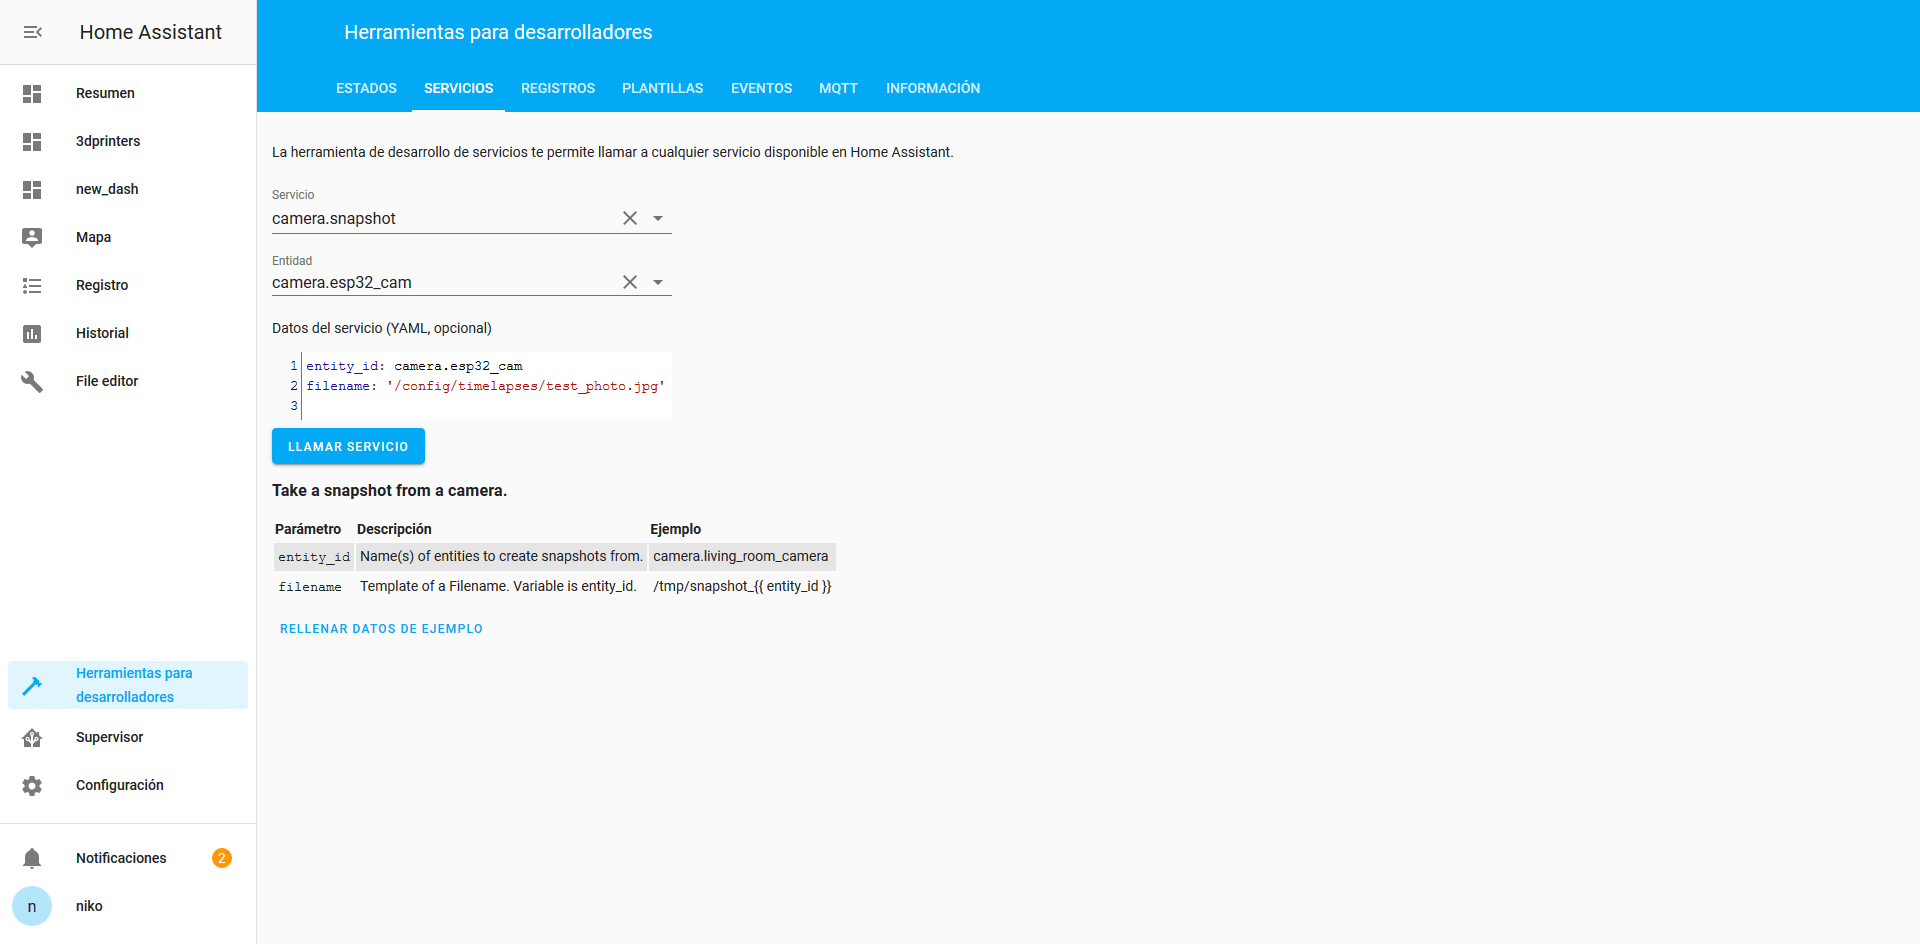
-
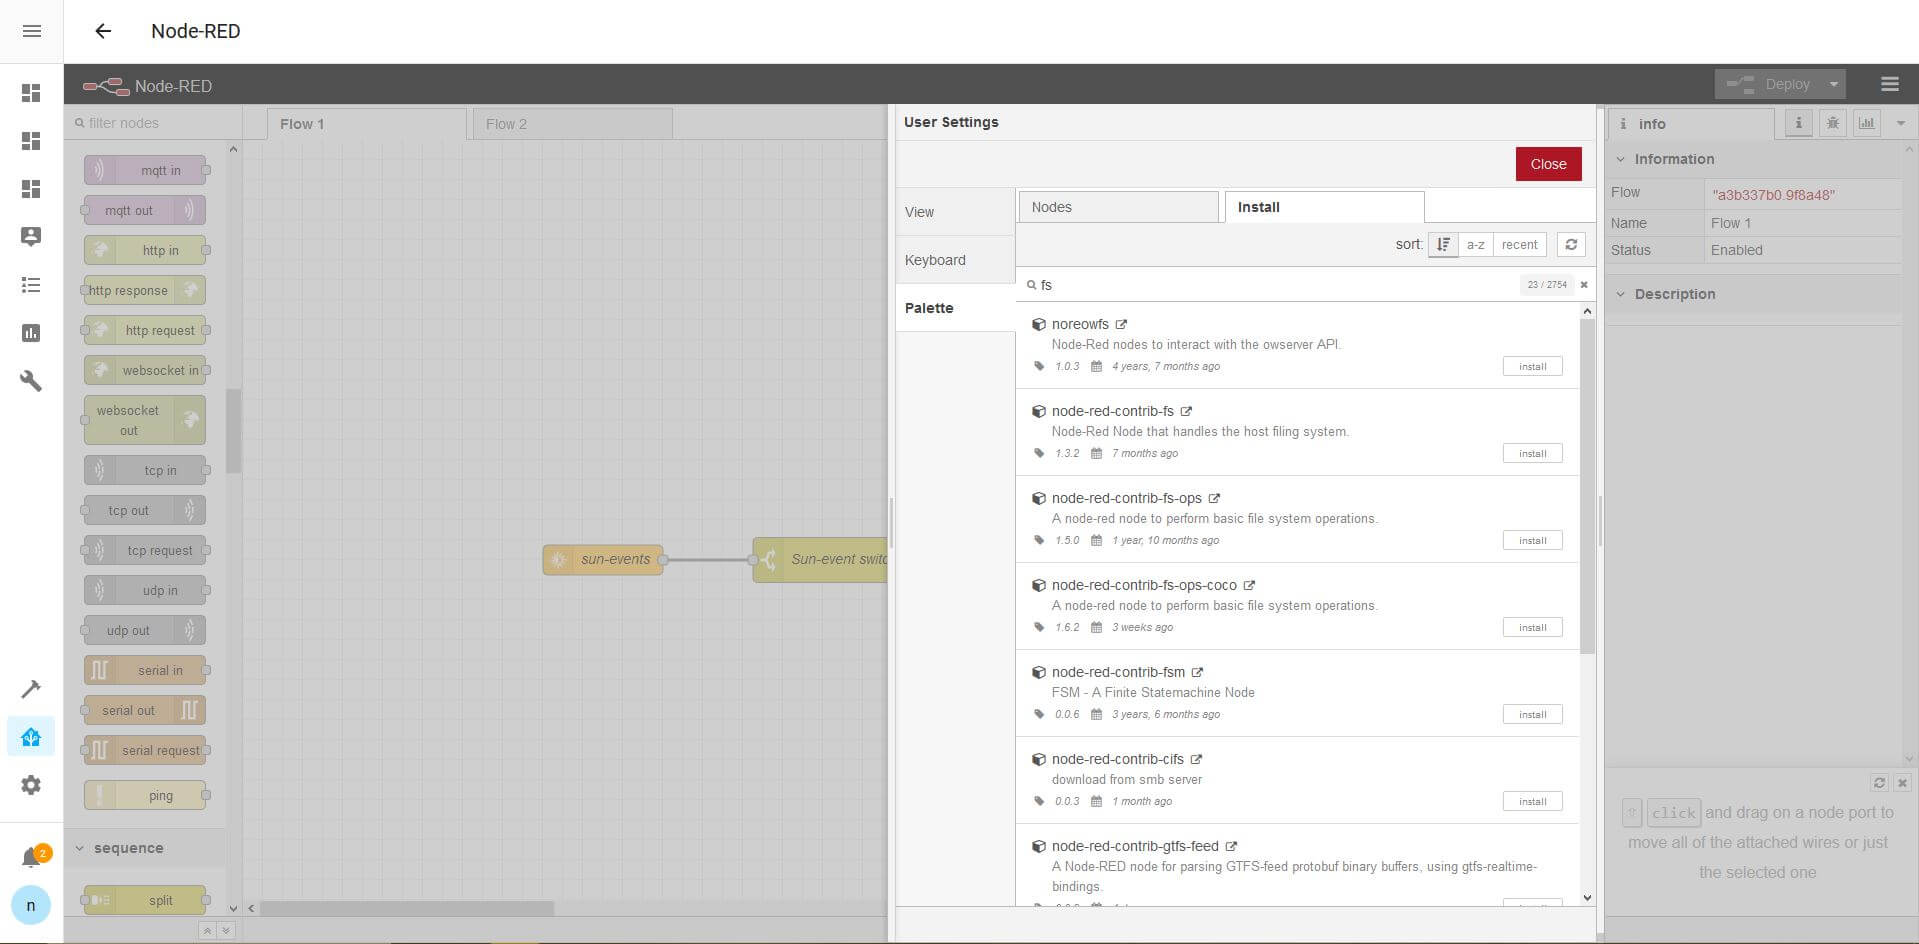
Install fs-ops-node red module You need to open your node-red webUI and under “Options”, under “Manage Pallete” tab you need to install the following module
-
Install moment node red module (if not present) Based on a solution from this post
-
Install Homeassistant Samba module (if not already) and configure to access from win 10 Following guide came in pretty handy.
Configuring your timelapse
We are going to make all the shots at desired timeframe, for this we will use node red, if you want to import the flow, you can find it in the following Gist. I used a 6 min interval, so i can have each 24h in a 20s video at 24fps.
General flow schematics
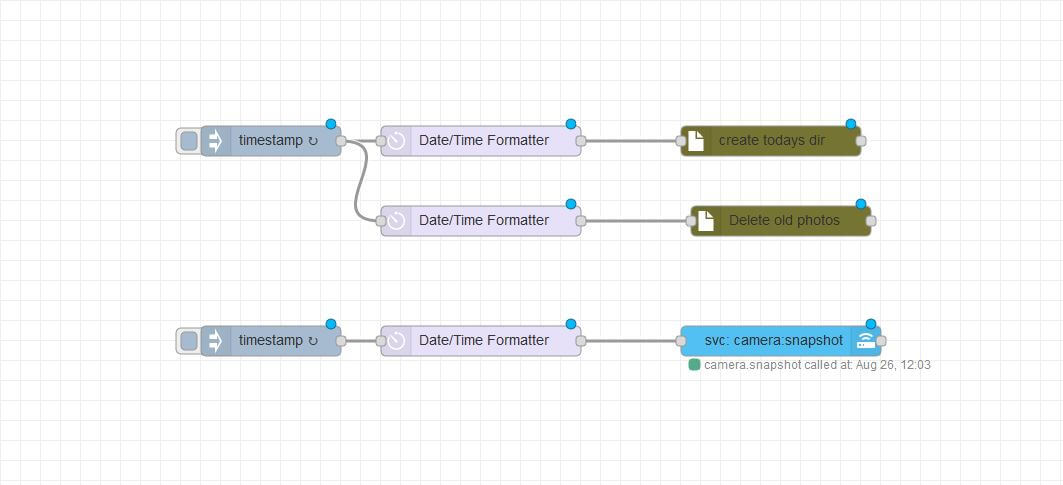
You will need only 5 nodes. 2 timestamps, first one will be triggered everyday at 00:00 and will create a folder to save the photos of the day, and will erase the older folders, just saving the days we Need/Want.
The second timestamp will be triggered every x minutes, and will make a photo and will save it in the day folder.
Retrieve the photos
At this moment i couldnt find any easy way to make the videos over my hassOS install. So to create the timelapse we will need to download the images using a samba server. We can access the photos of each day at your configured location, in my case /config/timelapses
Creating the timelapse
For this by the moment i’m using photoshop, as i’m retrieving the photos under a windows 10 OS and it’s already installed, but there are plenty of other solutions available.
In my case i used the following video.
%20esp32%20cam%20ESPHome%20easy%20timelapse%20setup)