This post is about the first 3d printer i got, the flyingbear P905X from aliexpress. At the time i have designed and tried some of different upgrades so i will list a how-to for anybody willing to repair or upgrade this printer.
Print problems found
- Z Layer movement between axis
- Difficult to align while building
- Crappy Hotend
- Bed is not straight and cant be calibrated with a glass
Recommended upgrades list
Hotend
- trianglelabs v6 hotend (files): Original hotend jams easily and is more difficult to find replacements, and is more difficult to calibrate in retractions.
- Nozzle fan (files): Mandatory?
- Capricorn tube: If you let it with a default bowden extruder, this printer needs a pretty long tube, a smaller inner diameter tube will take away most of your retraction problems.
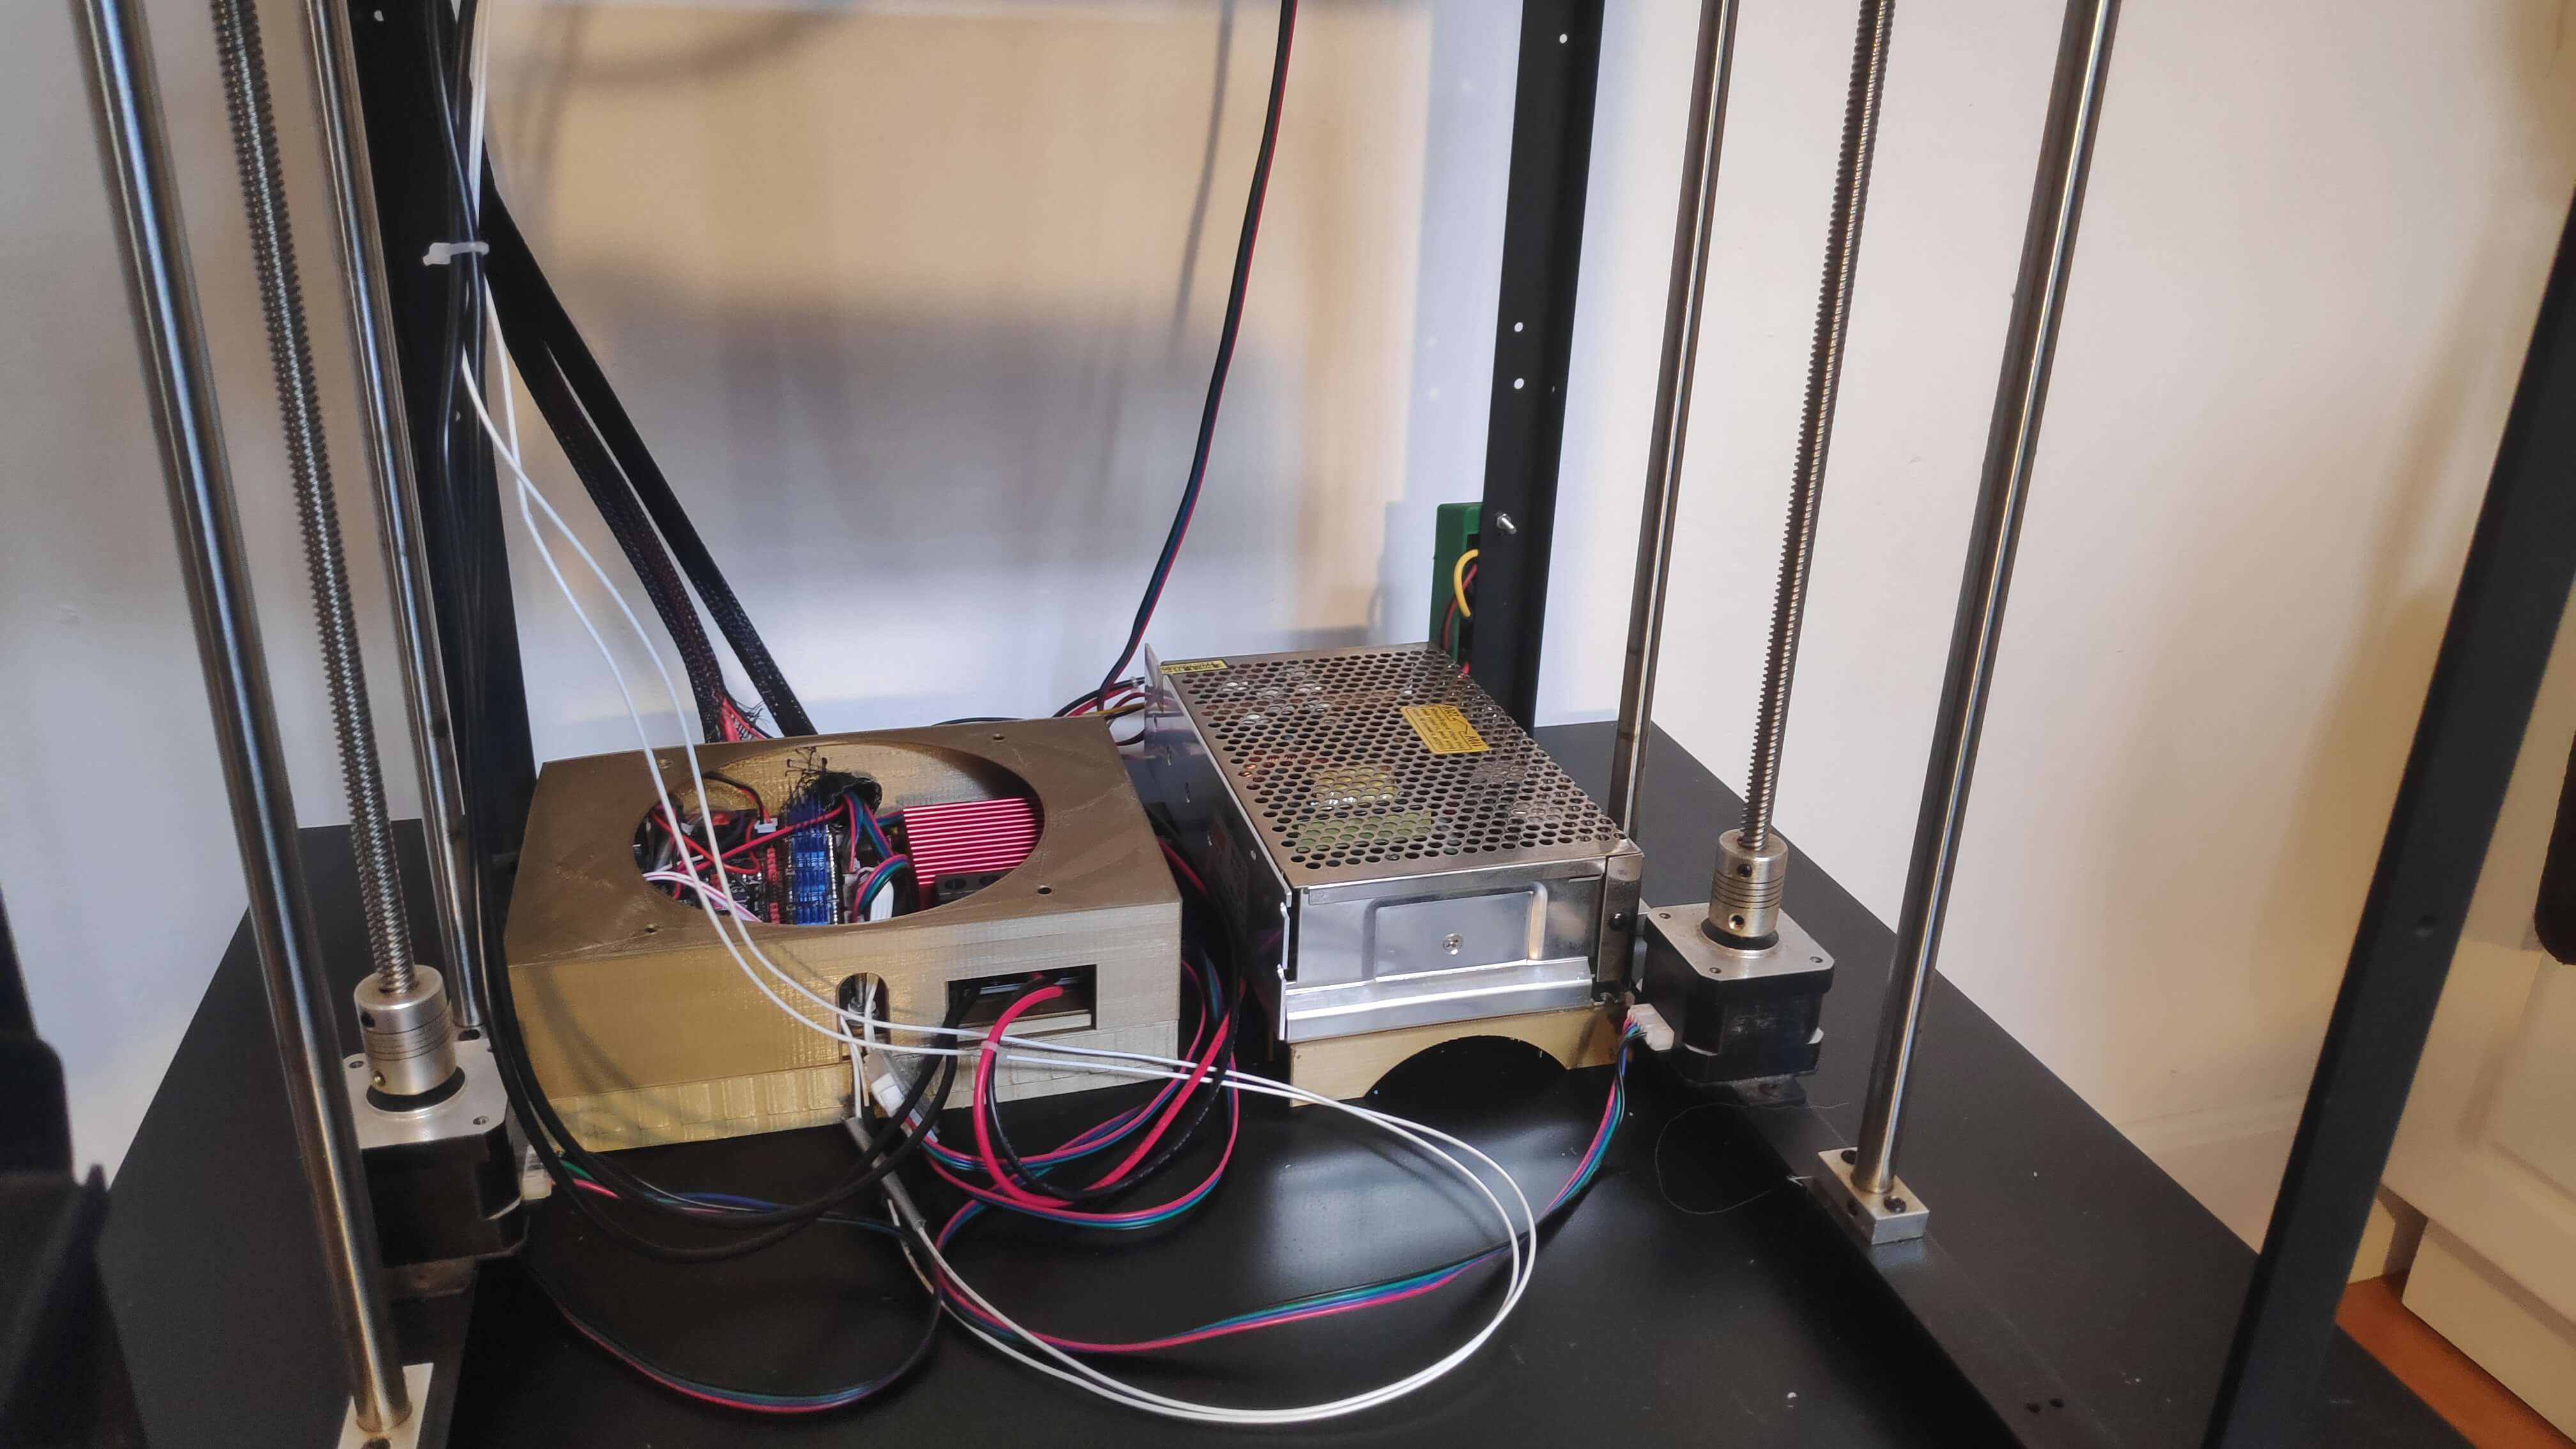
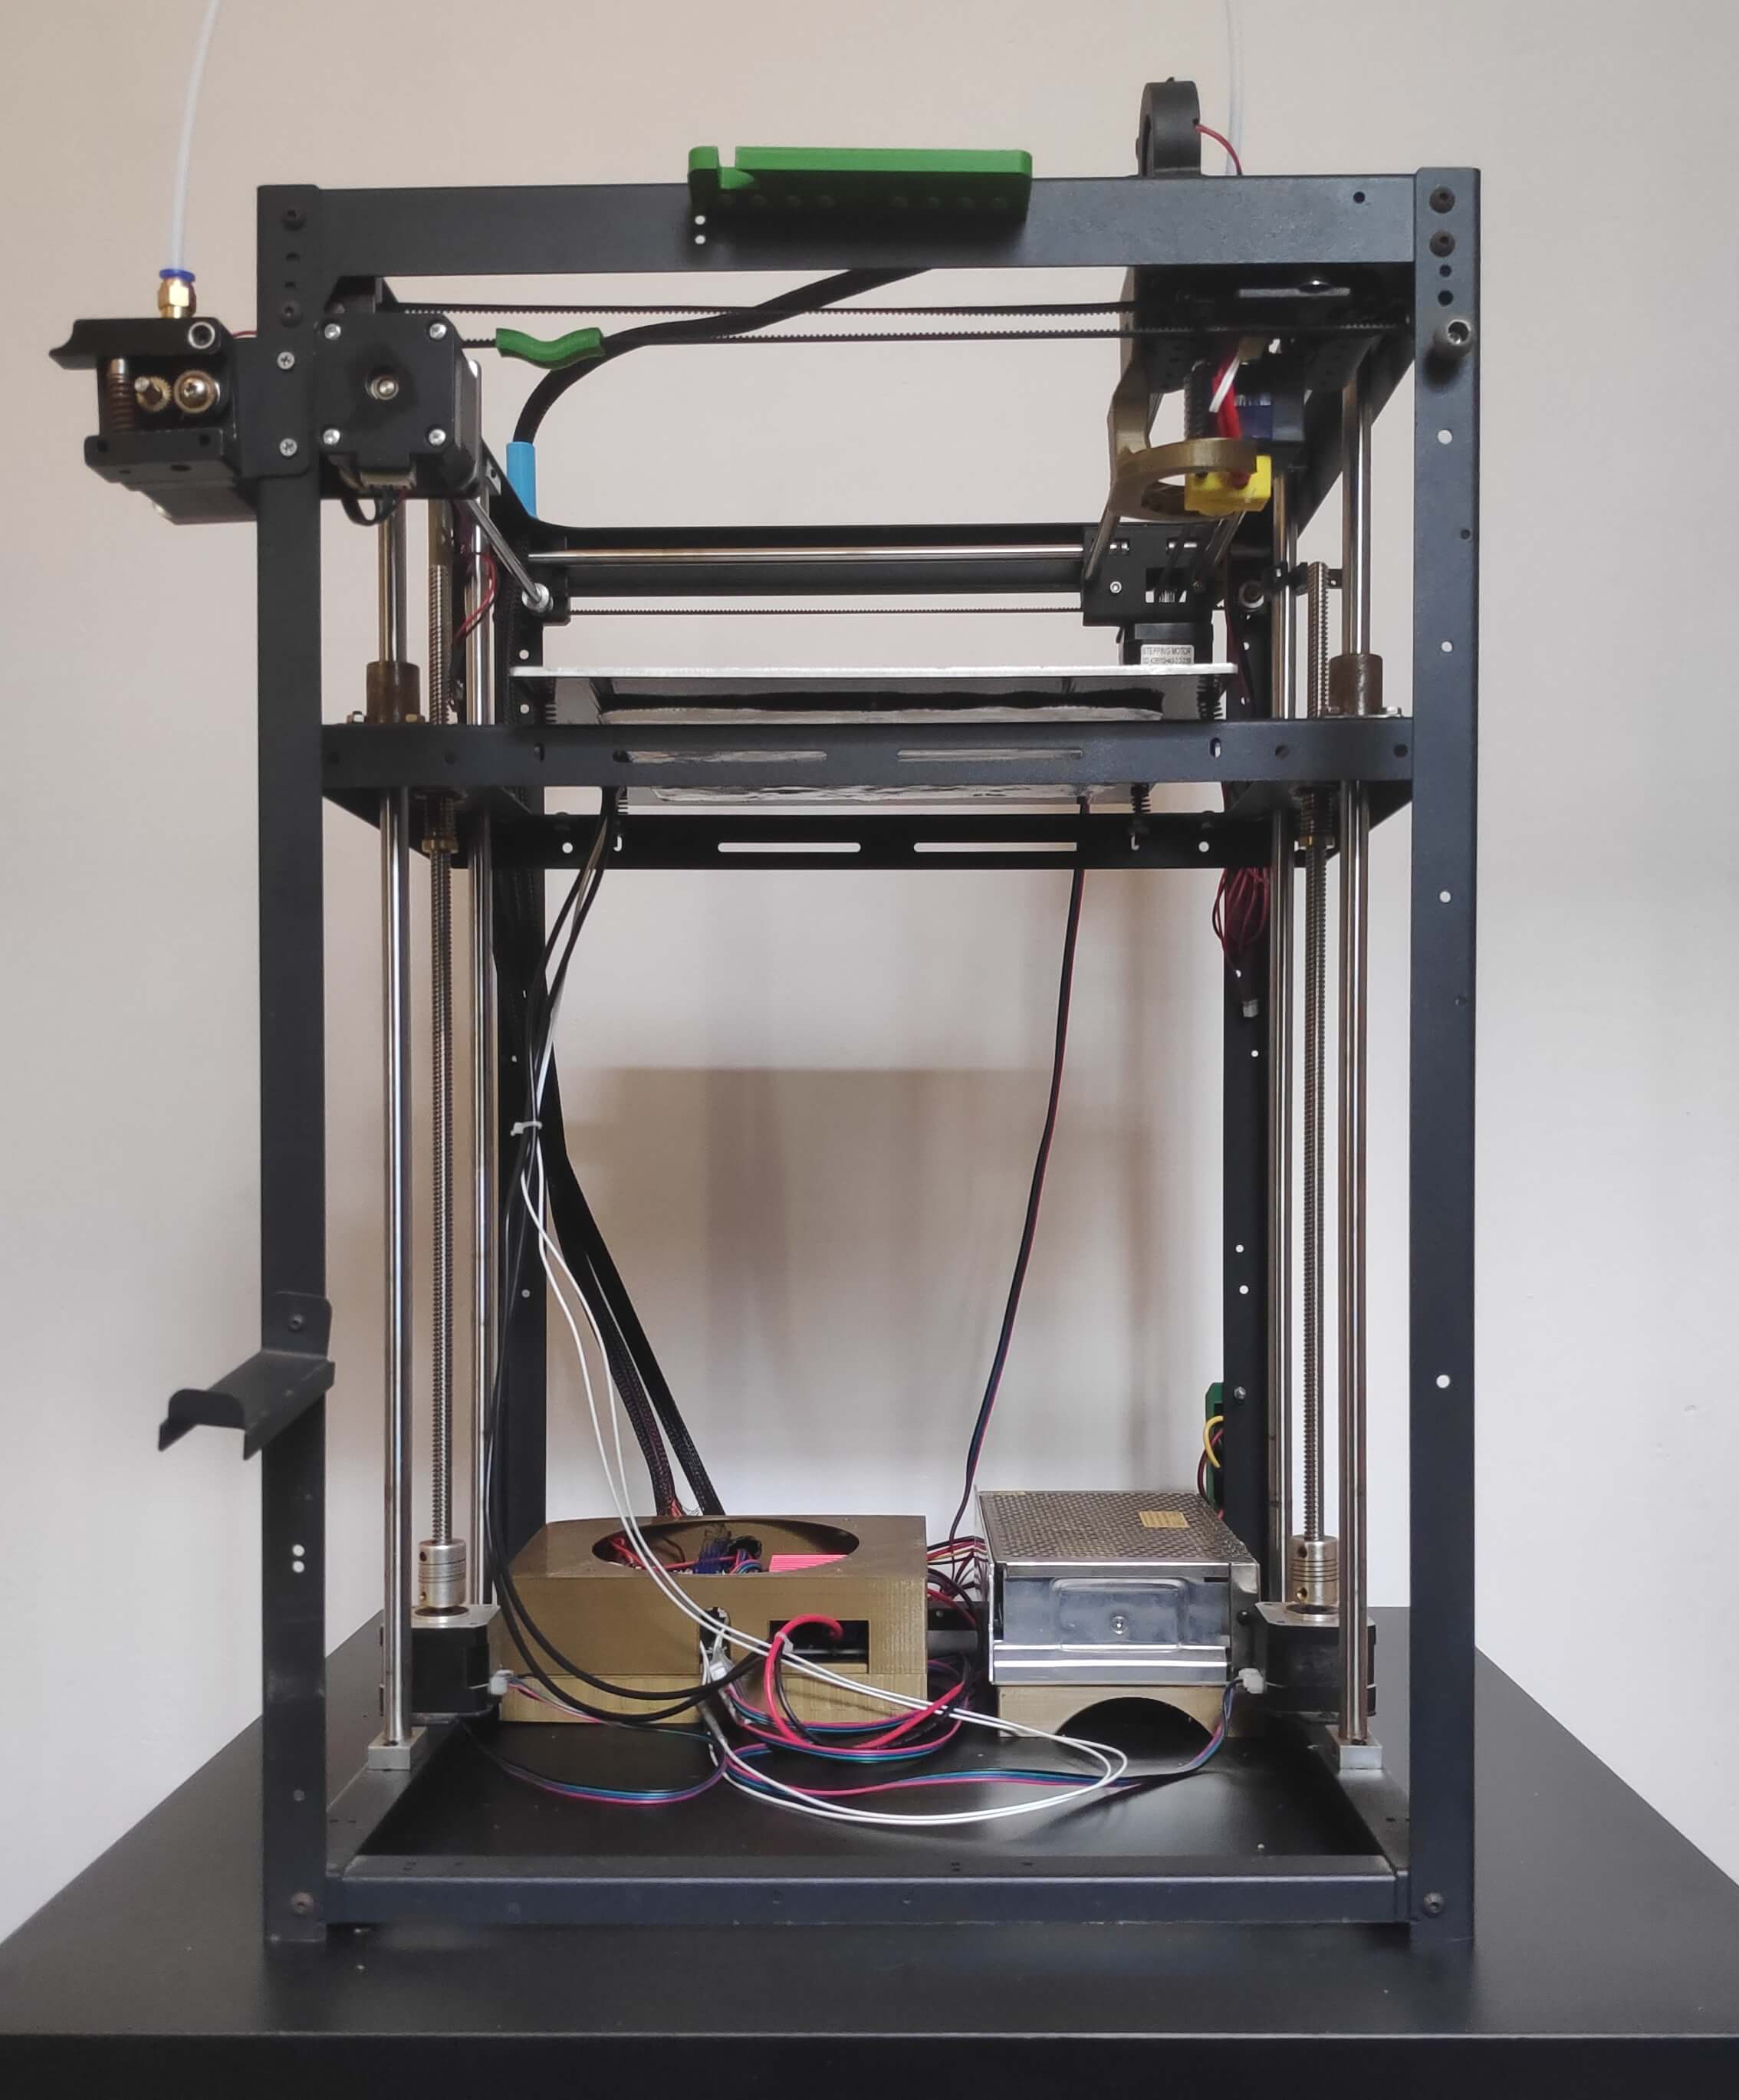
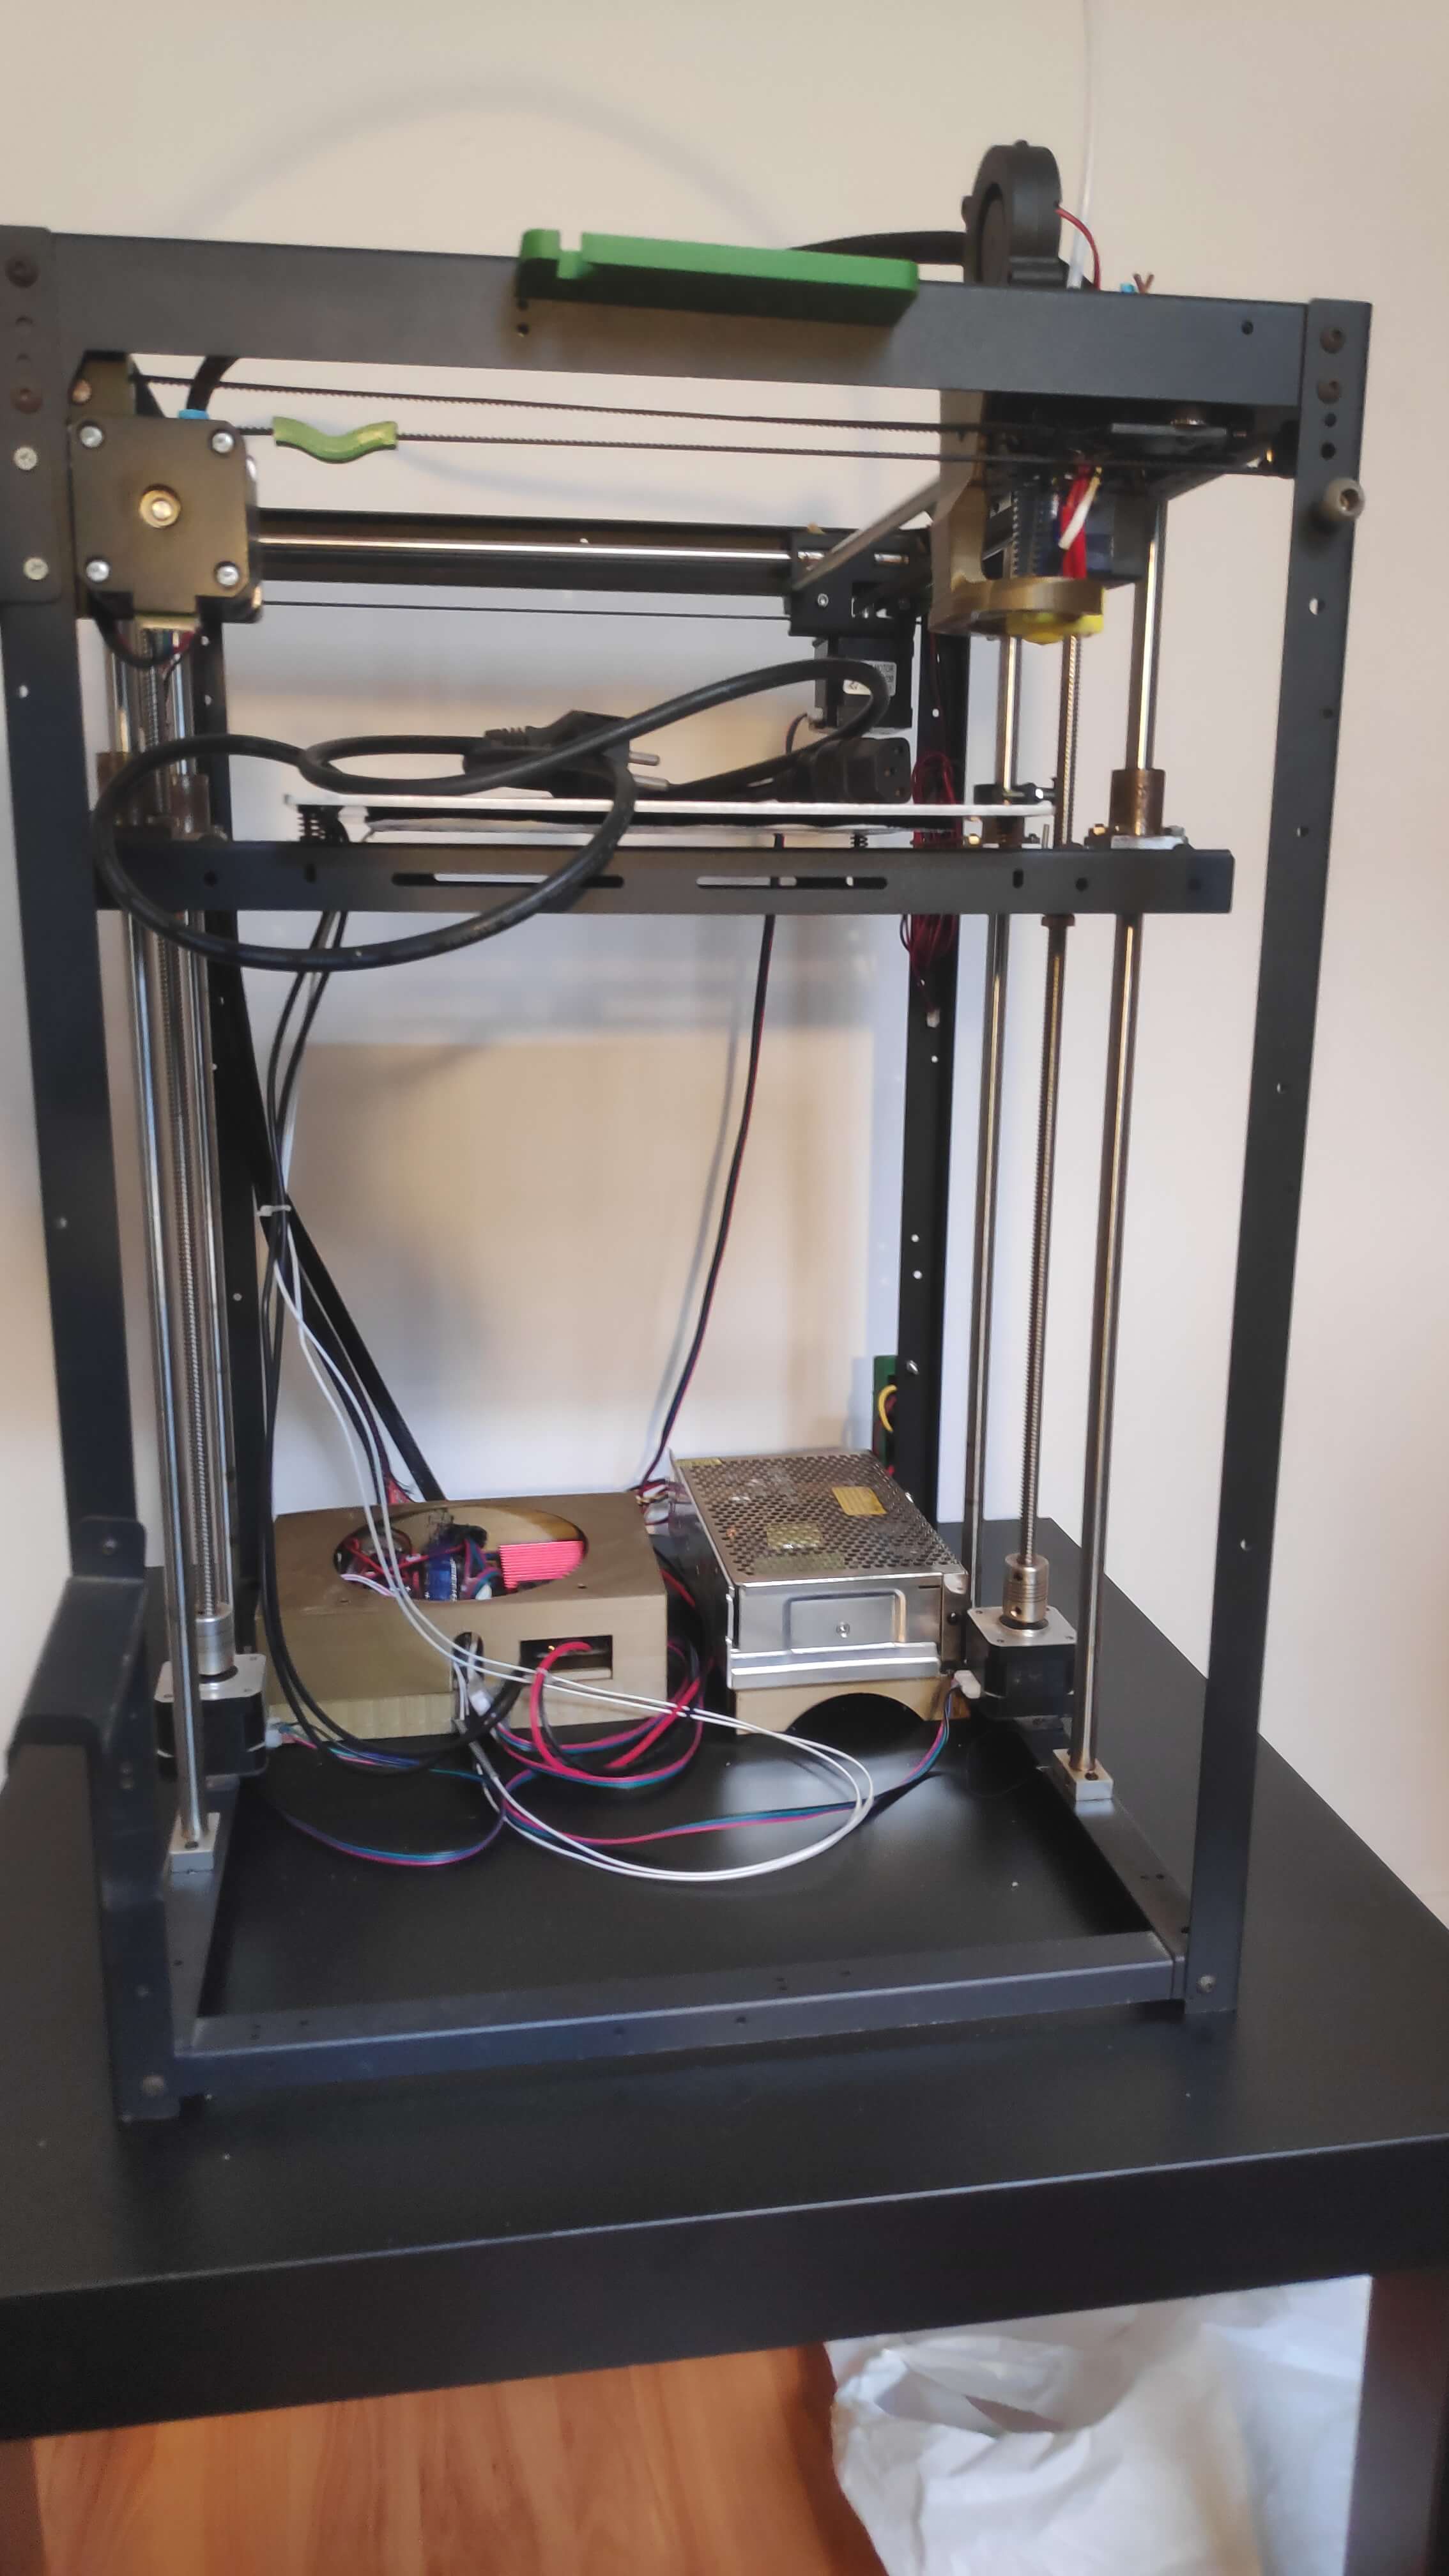
Frame and electronics:
-
Octoprint on rpi with MOSFET led switch(guide)
- Glass for the heatbed: I usually use some glass from old scanner and make it cut to the perfect size, 3mm glass is recommended.
- Z axis mechanical endstop(files): Original endstop never worked well for me and with the glass dont worked at all, so this is just mandatory in some cases, uses same endstops as X and Y axis.
- tmc2209 drivers: Let’s you implement X and Y sensorless homing and makes the printer way more quiet, i also changed the board for a SKR v1.3 as the original MKS board started to give problems.
- Z axis screws support (files): Centers the z axis threaded rods in the middle smoothening the z axis movement.
- Under bed electronics case with 120mm fan (files): After working on different cases on the back side of the printer, i decided to remake everything for a bottom based electronics case, it makes the cable management easier and makes the printer look way more neat, the con is that you will need to make some of the cables longer. Fiths original MKS GEN L board but also SKR V1.3.
- AC input cable connector with switch (files): Lets you connect, turn on and off the printer more easily
- Tube holder(files)
- Led holder(files)
Notes during assembly
Aditional printed assembly tools
- 2 Z axis jig
- 2 Z motors jig
- Link to files: thingiverse
Aditional assembly steps
- After finishing mounting by the manual using the upgrades you want, to calibrate the alignment of the printer i recommend:
- Loosening of all screws from:
- printbed (bearings, couplers and size adjustment screws)
- z axis (motor, and smooth rods)
- Mounting the z axis bearing holder
- Put the z axis jigs in place
- Move the bed to a top position, with both sides exactly at same height
- Tighten top part screws
- Move bed to a bottom position
- Tighten linear rods and motor to frame
- Move bed to a center position
- Tighten:
- Bed size adjustment screws
- Bed bearings and motor coupler
- Loosening of all screws from:
Final result